Use the following procedure to deploy sample wired authentication settings to NAP client computers for use with NAP and 802.1X enforcement.
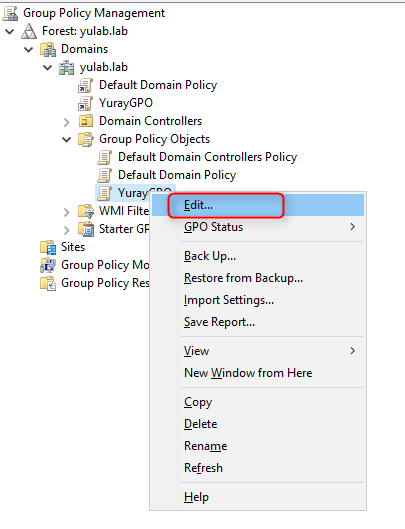
- Open Group Policy Management on Domain Controller.
- Create a new Group Policy Object or choose an existing Group Policy Object.
- Edit the GPO
- In Group Policy Management Editor, navigate to
Computer Configuration->Policies->Windows Settings->Security Settings->System Services->Wired AutoConfig
Then check Define this policy setting and choose Automatic.
Click Ok to save the configuration.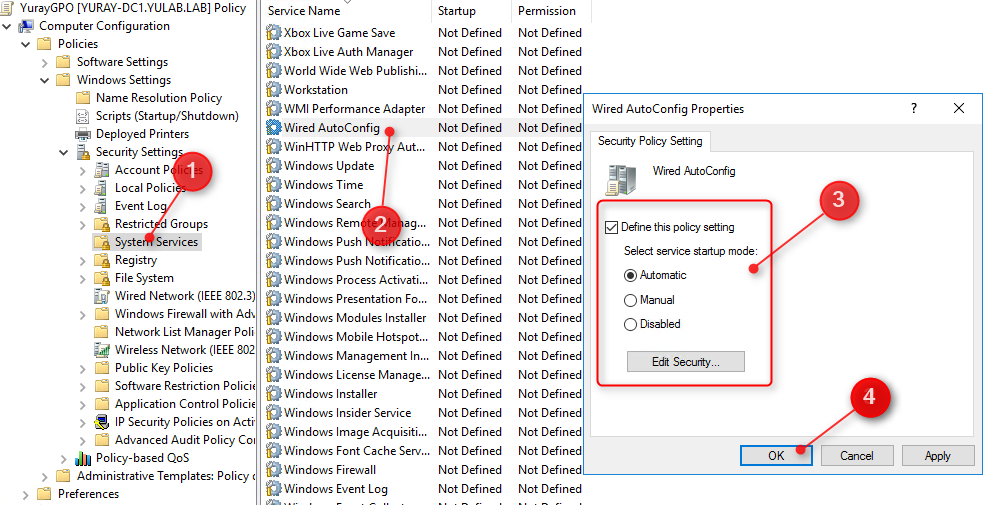
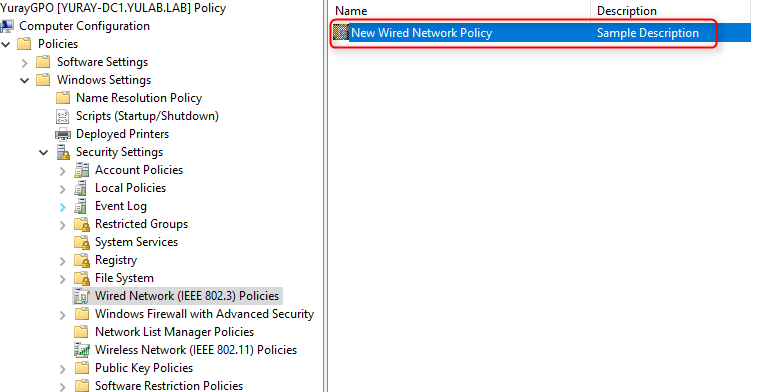
- Navigate to Computer
Configuration->Policies->Windows Settings->Security Settings->Wired Network (IEEE 802.3) Policies.
Right click on the right panel and click Create A New Wired Network Policy for Windows Vista and Later Release.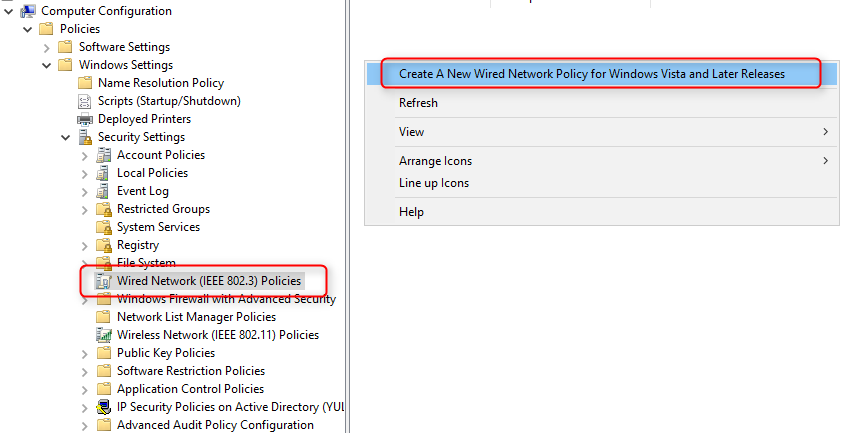
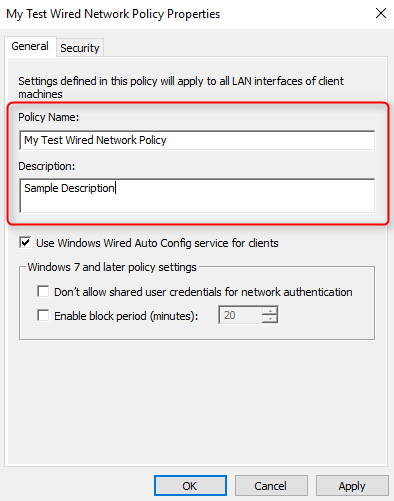
- Give a name and description for this policy on General tab.
- Set details in Security Page:
Select authentication method: Microsoft Smart Card or other certificate
Select authentication Mode: User or Computer authentication
Click Properties for more details Select
 User a certificate on this computerandUse simple certificate selection (Recommended)
SelectVerify the server’s identity by validating the certificate. In the Trusted Root Certificate Authorities: Select theSP Root Certification Authoritywith latest expiry Date if multipleSP Root Certificate Authoritycertificates are found on the notebook.
Click OK Click Ok
 - You should see the settings in right panel.
- Close the Group Policy Management Editor and back to Group Policy Management.
You should see 802.1x authentication’s settings are listed in GPO details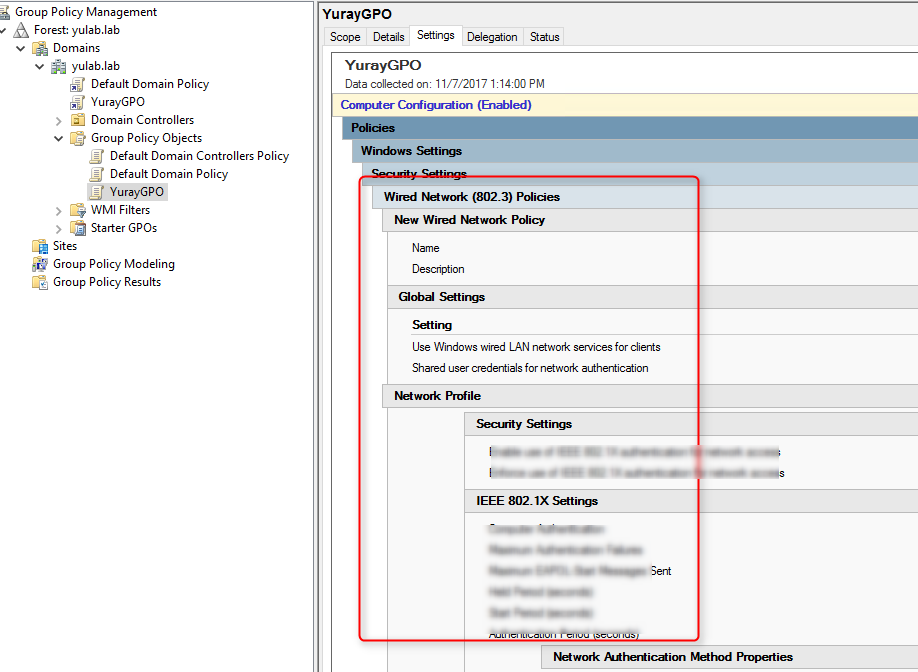
- Apply this policy to target machines.
- On client site, once the GPO is applied (you can run gpupdate /force in cmd.exe), user should get the settings.
#Non domain environment
Alternatively, you can export the Interface configuration profile from one machine and import to other machines.
- Manually configure the 802.1x authentication settings on one test machine
- Export the NIC profile:
1
2
netsh lan show profiles
netsh lan export profile folder=PATH_TO_FOLDER interface="INTERFACE_NAME" - Copy the XML file to target machine.
Run the below commands to import the wired profile:1
netsh lan add profile filename="PATH_AND_FILENAME.xml" interface="INTERFACE_NAME"
Reference: